Making bread to While Away the Time

Recently I have been playing around with yeast breads that are light on the kneading and the time commitment demanded of traditional breads. When this pandemic began I was working with a newly acquired cookbook, Ready, Set, Dough: Beginner Breads for all Occasions.

white-loaf-button flavour-loaf-button

Where have I been? What have I been up to?

The answer is one, perfectly beautiful granddaughter who will soon be a year old.

As well as cooking, baking, and recipes, I have long standing loves for needle arts. Basically, if it can be done with needles, I do it – sewing, dressmaking, knitting, smocking, needlepoint, cross stitch, and quilting. With a new baby, I was able to indulge all of these interests. I really love making things for babies and young children because they yield maximum results with a small commitment of time and materials and provide the maker with unlimited pleasure. Last Spring, my daughter Deanna captured most of these efforts for the record.

This slideshow requires JavaScript.

Countless sweaters and a crib quilt are some of the creations that have been added since. And if this stay at home continues much longer, my granddaughter will have enough sweaters to last her through elementary school!

Throughout, I have remained busy in the kitchen, reading and trying recipes, cooking through the holiday season last December and, as always, experimenting with all the elements that make for a fabulous taste experience.

Now, back to blogging!

With everyone staying in, bread-making seems to have become a national pastime. Along with toilet paper, flour and yeast are among the depleted grocery store items, driving some to experiment with sourdough starters.

Bread making and the wonderful smell of baking bread is in my blood. My Nain’s white rolls (like baps) were eagerly awaited at the baking table at the Welsh church’s fall bazaar.

My own mother wasn’t really into bread making but she always knew where to find bakeries that produced great breads, buns, and bagels. As a child, when we were at the cottage, we got our bread from Don’s Bakery in Bala. Along with their famous scones, they made a large, towering white loaf with a top crust so dark it was almost black. That was my favourite! Somewhere along the line they stopped making it and I have yet to find another bakery that makes such a loaf.

I love bread making and have been doing it for years. There have been some summers that I  made bread almost every day, putting it out in the sun to raise (and keeping a sharp eye on the chipmunks) or on grey and rainy days, popping it in the oven with the light on.

Recently I have been playing around with yeast breads that are light on the kneading and the time commitment demanded of traditional breads. When this pandemic began I was working with a newly acquired cookbook, Ready, Set, Dough: Beginner Breads for all Occasions. The initial recipes have the process down to combining the basic ingredients (about 2 minutes), kneading (4 minutes either by hand or machine), rising (15 minutes), and bake (40 minutes, starting in a cold oven) – not more than 10 minutes of active work and just over an hour from start to finish. For those baking with young children, whose patience might be tried by the hours long process of traditional bread making, this approach yields about as close to instant gratification as you can get.


AsideFor those home schooling, baking bread offers many learning opportunities for children and touches on several areas of the curriculum (social studies, math, science, and literacy). In my kindergarten classroom we had a large group of children, refugees from Syria, who spoke no English. Bread is common to every culture and so we baked bread to create common bonds and connections. A discussion before we started, enabled us to collect and chart what we thought we already knew about bread and capture our questions. We talked about this being one of the ways scientists work. Throughout the process, we observed the different ingredients – how they looked, felt, smelled – and how they interacted with each other.The children observed the changes created by the addition of water to the dry ingredients, the changes wrought through kneading, the effects of heat on the dough. While we enjoyed our freshly baked bread, we returned to our chart to compare our experience and observations with what we had thought, to see if our questions had been answered, and to add new learning and observations to our chart. Older siblings could assist with the chart making.


Not one to leave a recipe alone, I used the techniques of the basic bread recipe but veered off to do my own thing. Substituting mayonnaise for the 2 tbsp of olive oil in the original recipe yielded a more tender, slightly more flavourful loaf. Using two eggs, lightly beaten, as part of the 2 cups of water, produced a slightly denser, crustier bread. Both breads were delicious and vanished in the blink of an eye.

Now I was ready to be more daring.

8
Turning left-over bread into crisps – a delicious way to use the whole loaf

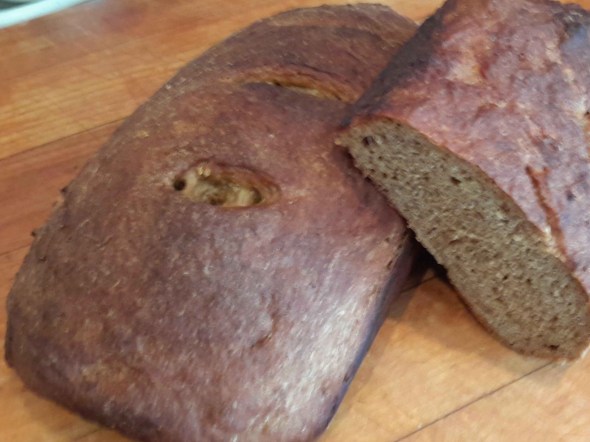
I wanted a loaf with more complex flavours but the same quick and easy approach. To achieve this, I substituted rye flour for some of the all-purpose and added allspice, grated orange peel, and fennel seeds. I also cut the water with some fancy molasses and substituted canola oil for the olive oil called for in the original recipe. The resulting loaf was boldly flavoured and the only change I would make going forward would be the addition of a handful of dark Thompson raisins. This bread lasted well for four or five days (mainly it survived that long because my son Peter does not like the licorice flavour of fennel). On day five, I thinly sliced the remaining bread and dried it in a low oven to make crisps. I can also imagine using this bread, cut into smallish squares, as the base for a canapé.

The cookbook I have been working with – Ready, Set, Dough: Beginner Breads for all Occasions — has several savory variations on the basic bread that are excellent and it also contains breads that have a more conventional approach. If you are looking for a book on bread, I’d certainly recommend this one.

A note before starting: the recipe uses both cup and weight measures. I find that the more accurate measure by weight (especially when using so much flour), generally results in a better end product. So many factors – such as the humidity in the air on a given day, how compacted the flour is in the measuring cup, etc – can have a significant effect on the amount of flour. Measuring by weight eliminates these variables that can adversely affect your baking. I use the weight measurements for all ingredients as appropriate. If you do not have a scale, the recommended method is to fluff up the flour in the bag then lightly spoon it into your measuring cup (be sure to use a dry measure cup), heaping it up a bit, then leveling it off with the flat edge of a knife.

Now – on to the bread!

white loaf - final-2

White Loaf

Button-PrintVersion-LowRes

  • Makes: 2 loaves
  • Time:
    • Mixing – Approx. 10 min
    • Rising – 15 min
    • Baking – 40 min
    • Resting – 10 min

Ingredients:

  • 6 cups (723 g) all-purpose flour
  • 2 tbsp (24 g) instant yeast
  • 1 tbsp (18 g) Kosher salt or 1 ½ tsp table salt
  • 2 tbsp (25 g) granulated sugar
  • 2 tbsp mayonnaise
  • 2 cups very warm water (about 120F)
  • 2 tbsp olive oil

Steps:

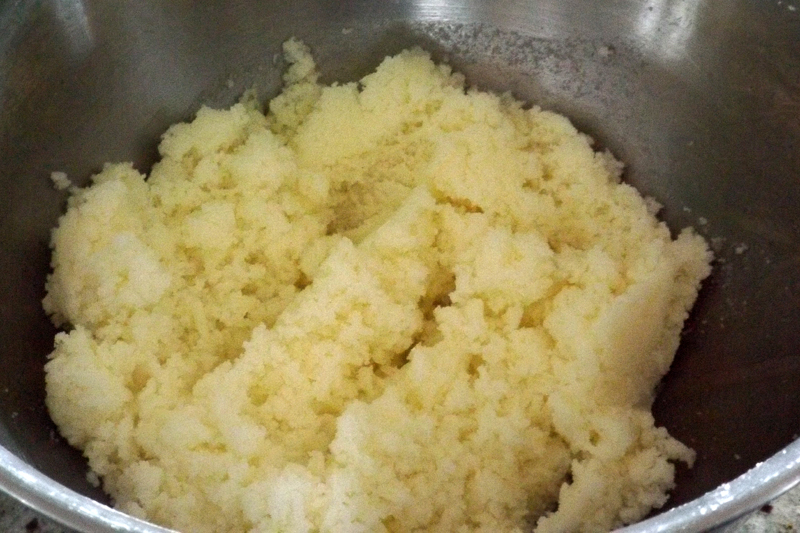
  1. Combine flour, yeast, salt, and sugar in a large mixing bowl. Yeast and salt do not like each other, so place them on opposite sides of the bowl. With a whisk, stir everything together. Add mayonnaise and water and, using a wooden spoon, mix everything together into a scraggly dough. There will still be a lot of flour not mixed in.

    This slideshow requires JavaScript.

  2. Remove the dough from the bowl and begin to knead the dough, working in the loose flour. Continue kneading until it all comes together and forms a smooth dough. This will take no more than 4 minutes whether you do it by hand or machine.

    This slideshow requires JavaScript.

  3. Place the dough back in the bowl (no need to clean it), cover with a tea towel, and put in a warm place to rise. I put mine in the oven with the oven light on. Let it rise for 15 minutes.

    This slideshow requires JavaScript.

  4. Gently punch the dough down and divide in half.
  5. You can either shape the dough onto two free form loaves and bake on opposite ends of a parchment lined baking sheet or shape the dough into loaves and place in lightly greased loaf pans.
  6. With a sharp knife, make three slashes, about ¼ of an inch deep, in the top of each loaf. Drizzle 1 tbsp of olive oil over each loaf. Place the loaves on the middle rack of a COLD OVEN. It is very important that the oven is cold.
  7. Place a pan of hot tap water on the rack below the bread.

    This slideshow requires JavaScript.

  8. Set the oven on 400F and bake the dough for 40 minutes.
  9. After 40 minutes, the bread will look risen and golden brown and sound hollow when tapped on top. I have never found the bread to take more than the 40 minutes. Removed the bread from the oven, cool for 10 minutes, then remove to a wire rack to cool completely.

Variations:

  1. Replace mayonnaise with 2 tbsp vegetable oil.
  2. Replace the water with 2 cracked large eggs, at room temperature. Place the eggs into a measuring cup and beat with a fork until the whites and yolks are combined. Add sufficient hot water to make 2 cups of liquid. Proceed as described above.

Loaf-final-lr-2

My Flavour Explosion Bread

Button-PrintVersion-LowRes

  • Makes: 2 loaves
  • Time:
    • Mixing – Approx. 10 min
    • Rising – 15 min
    • Baking – 40 min
    • Resting – 10 min

Ingredients:

  • 140g (1 ½ cups) rye flour
  • 583g (4 ½ cups) all-purpose flour
  • 25g instant yeast
  • 25g granulated sugar
  • 18g Kosher salt
  • 1 ½ tsp ground allspice
  • Finely grated zest of 1 orange (one heaping tbsp)
  • 1 tsp fennel seeds (optional)
  • 1 cup dark raisins
  • ⅓ cup fancy molasses
  • 1 ⅔ cup hot water (about 120⁰F)
  • 2 tbsp canola oil

Steps:

  1. In a large bowl, combine the flours, yeast, sugar, salt, allspice, orange zest, and fennel. Yeast and salt do not like each other, so place them on opposite sides of the bowl. Stir with a whisk to combine. Next, stir in the raisins.
  2. Place the molasses in a liquid measuring cup and fill with enough hot water to make 2 cups. Stir together.
  3. Pour the water/molasses mixture into the flour mixture and stir together to make a scraggly dough.
  4. Remove the dough from the bowl and begin to knead the dough, working in the loose flour. Continue kneading until it all comes together and forms a smooth dough. This will take no more than 4 minutes whether you do it by hand or machine.
  5. Place the dough back in the bowl (no need to clean it), cover with a tea towel, and put in a warm place to rise. I put mine in the oven with the oven light on. Let it rise for 15 minutes.
  6. Gently punch the dough down and divide in half.
  7. You can either shape the dough onto two free form loaves and bake on opposite ends of a parchment lined baking sheet or shape the dough into loaves and place in lightly greased loaf pans.
  8. With a sharp knife, make three slashes, about ¼ of an inch deep, in the top of each loaf. Drizzle 1 tbsp of olive oil over each loaf. Place the loaves on the middle rack of a COLD OVEN. It is very important that the oven is cold.
  9. Place a pan of hot tap water on the rack below the bread.
  10. Set the oven on 400F and bake the dough for 40 minutes.
  11. After 40 minutes, the bread will look risen and golden brown and sound hollow when tapped on top. I have never found the bread to take more than the 40 minutes. Removed the bread from the oven, cool for 10 minutes, then remove to a wire rack to cool completely.
Advertisement

(Almost) Sugar Free Meringue

Button-JumpToRecipe-LowRes

Starting a blog is a fun and interesting for me (and a lot of work for my more tech-savy kids, Owen and Deanna). Through the blog I’ve reconnected with friends I’d lost touch with and have had some good conversations.

Good - 28One of my friends and I shared a back-and-forth on the challenges of hosting parties given all the dietary restrictions – beyond the usual food likes and dislikes – that abound today. For example, in my immediate family there are several considerations that have to be taken into account when planning a menu: one of my children has a nut allergy (developed as an adult), another has become lactose intolerant and cannot, like one of her aunts, tolerate pork or ham; a sibling has become lactose intolerant and cannot have gluten products unless they are organic; another family member is allergic to shrimp and prawns. All things considered, at times it feels like the list of foods that cannot be served is longer than the list of those that can! Plain rice anyone? Some of the problems are easily solved – like the pork and prawns – just don’t serve them. Keeping things both lactose and gluten free is more of a challenge. Finding organic flour is easy these days but we have a friend who has Celiac Disease and so any gluten-containing flour, organic or not, is out. My friend, with whom I was having the conversation,commented that my family sounded like hers, except that her husband is also diabetic and has to be very careful about sugar intake. As our conversation continued, she told me about how her husband, an Australian, loves pavlova and meringue which, of course, are mostly sugar. She had tried experimenting with various sugar substitutes and found them either way too sweet, with a bitter aftertaste, or, that they responded to heat in ways that didn’t work.

Now here was a challenge that I was excited to tackle! How to get the sugar out of meringue and yet have a good meringue. And, four cartons of egg whites and numerous eggs in the shell later, I think I have an answer.

It is important, however, if sugar consumption is critical for you, that you make your own determination of what amount is good for you. I am not an expert on diabetes or blood sugar levels.

Good - 1

Meringue 101 – The Prerequisite

Meringue is basically sugar suspended in egg white and baked. Rather than going the sugar substitute route, I decided to see what was the least amount of sugar I could add and still get an edible meringue.

Good - 26
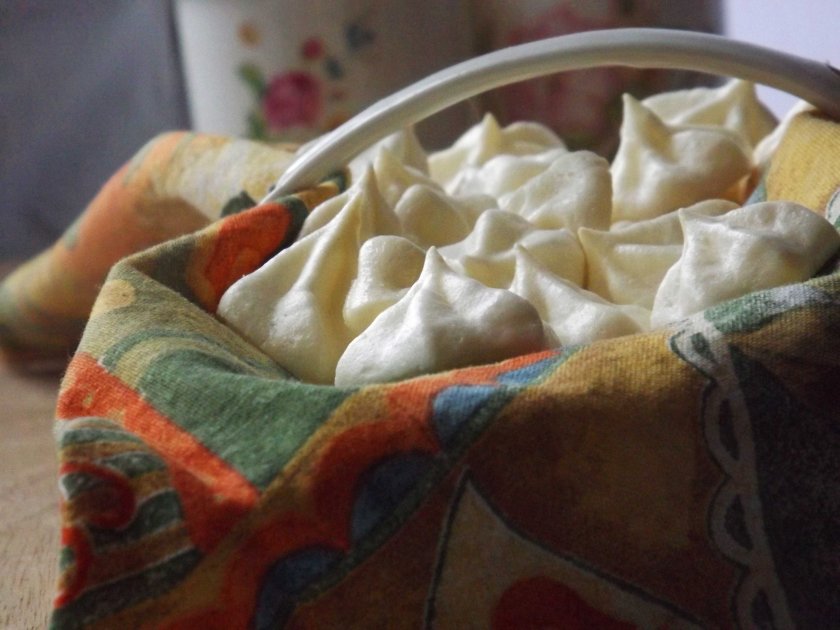
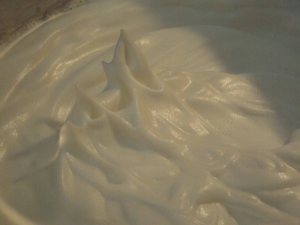
My starting point was classic meringue. My Nain used to make meringue nests quite often and stored them in a huge glass jar. They were sweet and crispy – the kind of crispy that taught you why a fork and spoon are provided across the top of your place setting for dessert. If you didn’t pin down the meringue with your fork, more often than not a chunk of meringue went flying across the table (and if you were really unlucky, off the other side and into someone’s lap) . The meringue nests got various fillings – lemon curd, a mousse, or ice cream and sauce. All very good but definitely an etiquette challenge.

From watching The Great British Bake Off I have learned that the most desirable meringue is not just  crisp on the outside but softer and more marshmallowy on the inside. This difference in texture is achieved by the addition of a small amount of either lemon juice or vinegar as the meringue is being beaten. Personally, I prefer lemon juice to the slight note vinegar leaves.

Aside from egg whites, the next major ingredient in meringues is sugar; as much as two cups over four egg whites in some recipes – enough to make your teeth want to retract back up into your gums and completely impossible for a diabetic.

Reinventing the Wheel

I started with a rough estimate of how much sugar might be acceptable using my friend’s information (1 tsp of sugar over 2 meringue cookies) and worked to lower the sugar even more to allow for fillings in a meringue nest or pavlova. For the meringues I developed, I used 8 tsp of sugar for 4 large egg whites (12 tbsp of egg white from a carton). When whipped up, this amount will yield about 8 – 3 inch meringue nests or 1 large pavlova base. That amounts to no more than 1 tsp of sugar per nest!

Good - 23
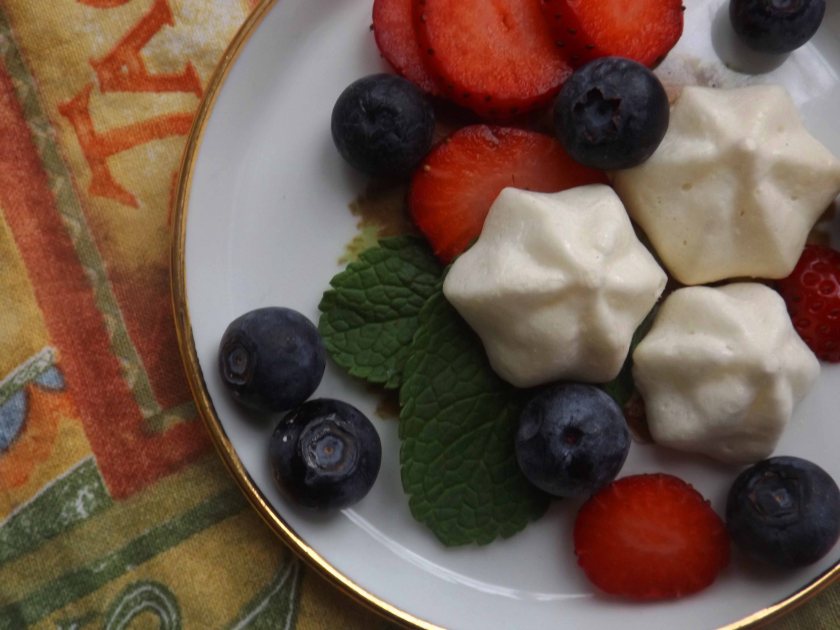
While working on the sugar reduced meringues, one of the first things I found was that using my stand mixer beat way too much air into the whites and the baked product was akin to styrofoam. Using my electric hand mixer on high worked perfectly.

To help stabilize the whites (especially because of the drastically reduced amount of sugar), I used somewhat more cream of tartar than would normally be used for the number of egg whites. Finally, without all the sweetness of sugar, the meringue was lacking in taste. This problem was remedied with vanilla extract, a small amount of almond extract, and a pinch of salt.

When baking, I found that small meringue kisses piped through a large star tip, crisp up with a 25 to 35 minute bake and can be cooled either in or out of the oven. Larger meringues, like the nests, shrink a little during baking and cooling and then need several hours to crisp up.

Good - 12
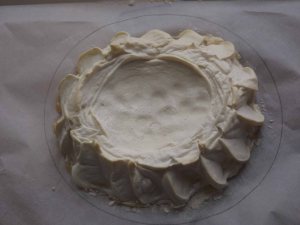
The real baking challenge was the large shell for for a pavlova. I tried baking it at a higher starting temperature (350F – normally meringues are baked at between 200F and 250F for around an hour) to set the meringue. Then, after 5 minutes, I turned the temperature back down to the more usual range to finish baking but the meringue browned too much and didn’t crisp. I tried a longer bake at a low temperature. The first attempt at this resulted in a charred meringue as the oven setting had somehow got changed from Fahrenheit degrees to Celsius without me noticing. Oven tricks aside, the longer bake at a low temperature was ultimately a fail. It looked good but it just wasn’t crisp.

This effort was left sitting to one side in the kitchen for two days before it caught my attention again. And guess what? It was nice and crisp on the outside and softer on the inside! Looks like a prolonged drying time was all that was needed. Lesson learned: if you want to make pavlova using this meringue recipe, start three days ahead of when you want it. Other alternatives are to either make a deconstructed pavlova using “kisses” or individual pavlovas with meringue nests. All the meringues will keep several days in a dry, airtight container once they have crisped.Good - 16

Meringue 201

Now, whether making a high or low sugar meringue, there are some basic rules that apply. Meringues are sensitive to moisture and humidity in the air so it is always best to make them on a dry day. Most important of all, however, is that the egg whites remain totally free of any fat because even the smallest amount of yolk in the whites will prevent them from whipping up properly. Also, the bowl in which you are whipping the whites needs to be either glass, stainless steel, or copper. Bowls made of plastic or other materials may look clean but, in fact, they have absorbed fats and oils over time and will prevent your egg whites from whipping up. I do not even use rubber or wooden spatulas in my egg whites before they have reached the desired degree of stiffness.

I found that there is very little difference in performance between using egg whites from a carton and egg whites obtained by separating whole eggs in the shell except that I was then left with a lot of yolks that I didn’t necessarily have a use for. On the other hand, if you are planning to make crème pâtissière or crème diplomat for your nests or pavlova, then whole eggs are the way to go. Whatever the source of your egg whites, you should let them come to room temperature before whipping them because they will whip up higher. Hint: it is easier to separate cold eggs just out of the refrigerator and then let the separated egg whites and yolks come to room temperature. The final thing to know about meringues is that they like a long slow bake in a low oven (200F to 250F) and are best left to cool for at least an hour in the turned-off oven. For full sugar meringues in particular, cooling in the oven helps to prevent cracking.

Good - 7
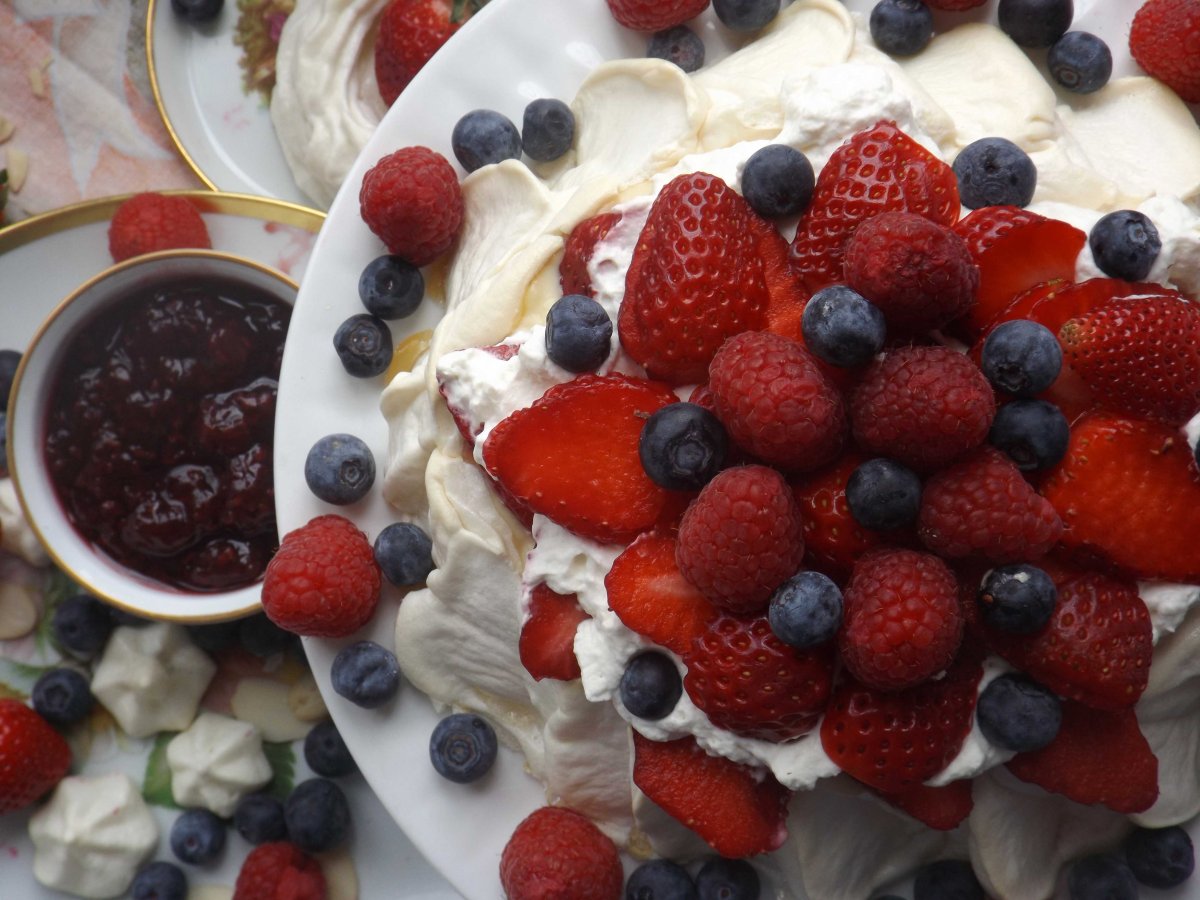
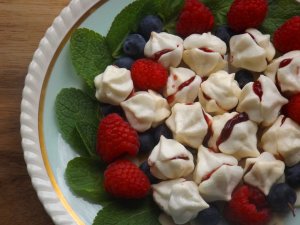
One last note about these low sugar meringues. Once they are exposed to moisture they soften much more quickly than traditional meringues. For this reason, I recommend not filling or constructing your nests or pavlova more than about 45 minutes before you plan to serve them. You can have all the elements ready and then it takes not even 5 minutes to finish the dessert off. You will also notice in the photos, that I have sandwiched some of the little kisses together with raspberry jam and they became soft quite quickly. The jam I used was a President’s Choice blue brand that I hadn’t noticed before: a raspberry jam without added sugar and also without any artificial sweetener (which I can always taste). It’s quite a moist, soft-set jam, but really good. I’ve also been using it as an accompaniment to lemon cheesecake.

Good - 20
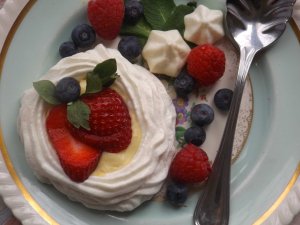
Because my trials and experiments left me with egg yolks, I also made an orange flavoured crème pâtissière in which I reduced the sugar to 1 tbsp for the whole amount and used orange extract and orange zest for the flavouring. If you are not concerned about adding sugar or alcohol, you might want to increase the sugar to 3 to 4 tbsp and flavour with orange zest and an orange liqueur. For one pavlova, I used the crème pâtissière as was and then topped it off with vanilla flavoured, unsweetened, whipped cream and fruit. For the other pavlova and the meringue nests, I folded the crème pâtissière and the whipped cream (which I further stabilized with gelatin) together to make crème diplomat.

Meringues are quick and easy to make. You can have them in the oven in under ten minutes and the results are impressive and elegant.

So, let’s make meringues!

Good - 11

Crispy and Practically Sugar Free Meringues

Button-PrintVersion-LowRes

**It is important if sugar consumption is critical for you, that you make your own determination of what amount is good for you. I am not an expert on diabetes or blood sugar levels. **

  • Serves: 6-8
  • Hands-on Time: 10 min
  • Cooking: 45 min

Ingredients:

  • 4 large egg whites (or 12 tbsp. egg white from a carton), at room temperature
  • ½ tsp. cream of tartar
  • ⅛ tsp. salt
  • 8 tsp. granulated sugar
  • 1 tsp. pure vanilla extract
  • ¼ tsp. pure almond extract

Meringue Steps:

  1. Preheat the oven to 225F. Line a baking sheet with parchment paper. If you are making nests, draw eight 3” circles, about 2” apart, on the parchment and then turn it over so the pencil marks won’t transfer to your meringue. If you are making a base for a Pavlova, draw an 8” or 9” circle on the parchment and turn over.
  2. With an electric hand mixer or a balloon whisk, beat the egg whites until they are frothy – like the foam on a latte. Sprinkle the cream of tartar and salt onto the whites and continue to beat until you have soft peaks (another minute or two). Gradually start to beat in the sugar, about a teaspoon at a time and continue to beat until you have stiff peaks and you can no longer feel any graininess or grit when you rub a little of the mixture between your fingers. It should feel completely smooth. This indicates that the sugar has totally dissolved into the egg whites.

    Whipped Peaks
    Eventually it should have whipped peaks.
  3. Add the vanilla and almond extracts and beat for another three minutes.
  4. At this point you have several options:
    1. Meringue Nests – spoon the meringue onto the circles you drew and then spread them out from the centre with the back of the spoon, building up the edges to form a nest.
      1. Another way to make a meringue nest is to place the meringue in a large piping bag fitted with a large open star tip. Then pipe the meringue onto the circles, starting at the centre and piping out in concentric circles until you reach the edge. Then you can build up the sides by piping around the outside ring, one layer on top of another until you have three layers forming the sides.
    2. Pavlova – mound the meringue in the centre of the circle and then use a spatula to work the meringue out from the centre, make sure that there is an indentation in the centre when you are done. Smooth out the meringue on the sides as if you were icing a cake and then make deep diagonal grooves from bottom to top at intervals, all around the circle of meringue.

      Dip
      Baked Pavlova – Dipped Centre
    3. Kisses – Pipe the meringue into kisses using the large open tip star (you can also do this with extra meringue if you have some left after piping your nests).
    4. Eton Mess – Spread the meringue flat on the sheet in a single layer.
  5. Once you have formed your meringues, place them in the oven and bake them for 35 to 45 minutes. The meringues will still feel soft and kind of leathery, but not sticky, when touched gently. If they still feel sticky and show your fingerprints, bake for about 10 minutes longer. Turn off the oven and leave the meringues in it to cool for about an hour. After that, remove the meringues from the oven and cool completely. Nests will take about three hours to crisp up, Pavlovas, up to three days. Drying meringues out with so little sugar just takes patience.
  6. Depending on whether you wish to make a nest, Pavlova, or Eton Mess, do the following:
    1. Nest – You can treat the nests as mini Pavlovas or use other fillings such as lemon curd, a mousse (fruit or chocolate flavoured), ice cream and sauce, or sherbet. Add any other sprinkles or decorations.
    2. Pavlova – Place the meringue base on a serving plate. Fill the centre of the meringue with either crème diplomat or a layer of crème pâtissière, followed by a layer of stabilized whipped cream (see below). Decorate with the fruit of your choice. I used strawberries, raspberries, and blueberries. Just have lots of fruit.
    3. Good - 10
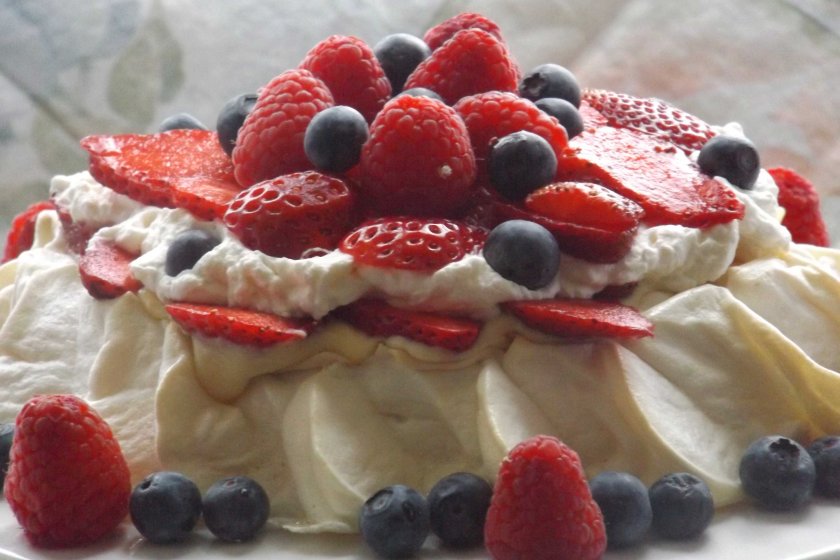
Eton Mess (or Eat-in-a Mess) – In a blender or food processor, purée most of a pint of strawberries, keeping a few back to chop roughly by hand. Fold the puree and chopped strawberries into stabilized whipped cream to combine. Break the sheet of meringue into pieces that range in size up to 5 cm. Fold the smaller pieces into the whipped cream/strawberry mix. You will not use all the meringue – maybe about half of the sheet for about 6 servings. Store leftover meringue in an airtight container for up to two weeks. Fill a fluted or other glass with the mixture and stick a few larger shards of meringue into the top to decorate. Serve chilled.

Crème Pâtissière

  • Serves: 6-8
  • Hands-on Time: 20 min

Ingredients:

  • 1 ¾ c milk
  • ¼ c whipping cream
  • 1 tbsp. granulated sugar
  • 4 large egg yolks
  • 1 large egg
  • 2 ½ tbsp. cornstarch
  • Pinch of salt
  • 1 tbsp. vanilla bean paste or vanilla extract
  • ½ tsp. pure orange extract
  • Grated zest of 1 orange
  • 3 tbsp. unsalted butter, softened

Steps:

  1. Place milk and cream in a saucepan and bring to a boil over a medium heat.
  2. While the milk is heating, combine sugar, egg yolks, large egg, cornstarch, salt, and vanilla in a bowl and whisk them together until thick and smooth. Set aside.
  3. As soon as milk starts to boil, remove it from the heat. Slowly pour about half of the hot milk in a thin stream into the yolk mixture, whisking constantly, so that the yolks become tempered before being added to the remaining milk. Add the now-tempered yolks to the remaining hot milk still in the saucepan.
  4. Heat the custard base over medium heat, stirring constantly, until the mixture begins to thicken, about 2 to 3 minutes.
  5. While continuing to stir constantly, let the mixture come to a boil. You will see bubbles begin to rise to the surface. Cook a further 1 to 2 minutes after the custard begins to boil. Remove from heat and add orange extract and zest. Stir to combine. Whisk in the butter thoroughly.
  6. Pour the custard into a bowl and cover with plastic wrap. The wrap should be placed directly on the surface of the custard to prevent it from forming a skin.
  7. Let the custard cool to room temperature, then refrigerate it for a few hours or overnight to chill completely.
  8. Use the crème pâtissière as desired.

Tip: You can make the custard dairy free by using any neutral-flavoured milk substitute of your choice.

Alternatives:

  • Stabilized Whipped Cream – Soften ½ tsp. of gelatin in 1 tbsp. of cold water to soften the gelatin. Then gently warm the mixture on the stove top until the gelatin melts into the water and you have a clear liquid. Begin to whip the cream and once it thickens somewhat, add any sugar and flavourings (if using), then pour the gelatin into the cream in a thin stream while beating continuously. Continue to beat until quite thick, being careful not to overbeat.
  • Crème Diplomat – Fold about half of the chilled crème pâtissière into the stabilized whipped cream. Use as desired.

Good - 15 - SQ

Soupapalooza

I can truthfully say that a river of soup runs through my life.

Button-BroccoliSoup Button-CarrotSoup Button-TurkeySoup

The last few days have been the kind of winter cold that makes me long for a nice hot soup. I love soup. When I was doing my Bachelor of Education at York University, I think I had soup every day for lunch. At least I had it often enough that it became a bit of a class joke. I, however, came to realize what a soul-satisfying source of nourishment soup can be.

Childhood: The Canned Years

As a child, I only remember ever having Campbell’s canned soup and at the skating rink learned what I, at the time, thought of as a really risque rhyme:

Campbell’s soup makes you poop,

Down your leg and in your boot.

My Nain made  the most delicious soup of my childhood but even she started with a can. And that can was Campbell’s Cream of Mushroom Soup, which she combined with her own homemade chicken or turkey broth. It was so good and, if I’m making soup from a can, which is rare, it is what I still do.

Adulthood: The Dawn of True Soup

I don’t think I had a truly homemade soup before taking the “Soup, Salad, and Muffins” course at Bonnie Stern’s cooking school and what a revelation! I found that making soup from scratch does not have to take a lot of time and, minute for minute, yields the most bang for your buck of anything produced in the kitchen.

Turkey_good_1

Homemade soup is so easy and can be rustled up from ingredients you likely already have in your refrigerator or pantry. It works just like the Stone Soup in the classic children’s story. I have been making soup from scratch ever since that eye opening Bonnie Stern class. I have also found that soup has connected me to others in some …odd…(and wonderful) ways.

I Soup Therefore I Am

EPSON MFP image
“Oh my god it’s Lipton’s!!” -Deanna

I have also discovered that others are interested in soup as well. Once in 1995, when I arrived in the schoolyard to pick-up my daughter, Deanna, from kindergarten, her teacher came hurrying down the steps to ask me about my chicken soup recipe that Deanna had been raving about. Goodness knows what a five year old can say about soup to arouse such interest, but I had to tell the teacher that this most wonderful soup was Lipton’s Chicken Noodle dry soup mix. (At that stage in her life, Deanna had a strong preference for processed foods). LOL.

Another time, the creator of the food show that used to be held on the CNE grounds, was looking for some sure-fire, nutritious recipes to include in their promotional materials and approached me. She hoped that I, as the mother of five and a recognized neighbourhood good cook, might have something that  would fit the bill. My Carrot Soup recipe was the first thing to spring to mind; its almost impossible to get wrong, very nutritious, and an excellent way to sneak other vegetables past the picky eaters which some children can be. And, so a soup came to be my first officially published recipe.

EPSON MFP image
Making Stone Soup

Over the years, soup and the act of making soup has provided the medium for some great learning and community building experiences. I made Stone Soup with my own kids using the recipe from the story. We would begin by finding a good stone on our way home from school. Once we found a stone that we liked I would give it a good scrub, then boil it for 15 minutes and allow it to cool before starting the soup. After rummaging through the fridge for ingredients we would simmer the ingredients and then puree the soup for a thickened liquid and voilà. Fun Fact: The rock adds nothing, but it managed to trick Deanna into eating a healthy soup. I later made this soup with the children in my classrooms because with Stone Soup, the more that goes into the pot, the better the soup.

EPSON MFP image
Vegetables?

In my MumNet group we chopped veggies and made Ribollita to take home while reconnecting after a break.

For the past few years a friend of mine has been active in organizing a group of us from the neighbourhood to make soup in support of Soup Sisters – an organization that provides warm soup to women in shelters and hostels. Most of us met years ago as young mothers with kids at the same school and the soup making has been a great way to touch base now that we’ve evolved beyond the school yard. As we chat and chop away an evening under the guidance of several chefs and soup experts, we produce gallons of soup.

When my mother and mother-in-law were ill and unable to eat most things, especially solids, homemade soup was the answer and for several years I was making batches of soup up to three times a week and sending it out in big, plastic juice jugs.

I can truthfully say that a river of soup runs through my life.

Soup 101

Carrot_good_2

No recipe is required to produce a good soup. At the very least you need water and one other ingredient (and a stone if you’re making that soup). Obviously this will not yield the soup of your dreams.

Soup is the most forgiving thing you can make in the kitchen, allowing you to play endlessly with flavour combinations and textures. About the only rule has to do with the quality of your ingredients. You do not need pristine produce for soup. However, your vegetables cannot have one foot in the disposal bin. As they used to say in the computer world, garbage in, garbage out.

An immersion blender is your best friend in soup making. It allows you to purée your soup right in the pot without having to transfer the hot liquid to a food processor or blender. The only time I forgo the immersion blender is when I want a flawlessly smooth soup. Then, I use a blender or force the soup through a fine sieve – achieving a smoothness that not even a food processor can accomplish. With the immersion blender I just have to shove the wand around the soup in its pot until all the chunks are reduced to a purée. Just be careful to keep the head submerged; otherwise it will splatter the hot soup all over the place.

Over the years I have developed a basic formula for creating a soup that will not fail to satisfy. It goes like this:

  • 1 tbsp. of butter or oil (any type)
  • 1 onion, coarsely chopped
  • 1 potato, peeled and coarsely chopped
  • 3 cups vegetable of choice, coarsely chopped
  • 1 litre of broth (salt reduced or no salt chicken, beef, or vegetable)
  • 1 can evaporated milk (regular or fat reduced)
  • Herbs (fresh or dried) and/or spices to compliment your featured vegetable. For ideas, think of classic combinations or tastes that you have enjoyed when added to your featured vegetable.
  • Salt and pepper, to taste

With these ingredients you then:

  1. In a large saucepan or Dutch oven, over medium heat, melt the butter or oil and sauté the onions until softened and translucent.
  2. Add the potato and other vegetables and cook for about 5 to 7 minutes, stirring every so often.
  3. Add the broth. If the broth does not cover the vegetables, add enough water to just cover. Bring to a boil, place a lid on the pot, reduce the heat, and simmer until vegetables are soft – 35 to 45 minutes.
  4. Purée, using the means of your choice, the vegetable/broth mixture. If you like some texture in your soup, leave some chunky bits.
  5. Stir in the evaporated milk. If the soup is too thick, add some additional milk (any kind) or water to thin it out.
  6. Add herbs and/or spices, to taste. You can use either fresh or dried herbs depending on what you have on hand. The rule of thumb is to use half as much of a dried herb as you would fresh. I usually start with a tablespoon of a finely chopped fresh herb or 2 tsp. of a dried herb. For spices, with the exception of hot spices such as cayenne, I add 1 tsp. at a time until I like the result.
  7. Add salt and pepper, to taste.

The combinations of things you can do with this basic formula are endless. If you want to add an additional step, you can roast your vegetables before making the soup. This will result in more depth of flavour and will also reduce the cooking time of the soup.

You can substitute any type of cream (from coffee cream to whipping cream) for the evaporated milk for a richer soup. Because of concerns about the fat content of cream, I eliminated it in favour of evaporated milk that provides a better sense of richness and creaminess than a straight milk substitute does.

I also discovered that silken tofu can be hidden in the soup without affecting its taste or texture by pureeing it in with the other soup ingredients. It’s a great way to up the protein and nutritional value of the soup without having someone object that they won’t eat tofu. Hello Canada’s new Food Guide!

The soup, prepared up to the end of step 4 can be packed in freezer bags and frozen for up to three or four months.

Two of my three “go to” soup recipes follow the Soup 101 formula; they are the broccoli and carrot soups below. As you’ll see, with the turkey soup, I’ve provided something a little different but no more difficult and just a little bit more time consuming – but so worth it. Soup’s On!

Broccoli_good_6

Broccoli Soup

Button-PrintVersion-LowRes

All the chopping for this soup can be done in a food processor or by hand. I  make the soup up to the end of step 4 and then freeze it (up to 3 months). Once defrosted, I then stir in the evaporated milk. For a richer and more caloric soup you can substitute 3/4 cup heavy cream – or other cream – for the milk. If you are using evaporated milk or a cream lighter than 35%, be careful not to let the soup boil as the dairy can curdle.

  • Serves: 6
  • Hands-on Time: 10-15 minutes
  • Cooking: 35-40 minutes

Ingredients:

  • 1 large onion, coarsely chopped
  • ¼ cup unsalted butter or margarine
  • 1 ½ lbs. broccoli (about 1 large bunch), trimmed
  • ¾ cup fresh parsley, coarse stems removed
  • ¾ cup fresh dill, coarse stems removed
  • 4 cups chicken broth
  • 1/8 tsp. Grated nutmeg
  • ½ tsp. salt and pepper
  • One, 354 ml can evaporated milk

Steps:

  1. Peel and coarsely chop the onion.
  2. In a large saucepan or Dutch oven, melt the butter or margarine and, over a medium heat, sauté the onion until it is soft and translucent.
  3. While the onions are cooking, trim the broccoli. Remove any little green leaves and cut off the florets high up the stems. Peel the lower stems, discarding the tough ends, and chop them coarsely. Add the broccoli to the onions and continue to sauté gently while you prepare the parsley and dill.
  4. Finely chop the parsley and dill. You can combine them and chop both at the same time. Add to the onions and broccoli. Add the broth, nutmeg, and about ½ tsp. each of salt and pepper. Bring to a boil, reduce heat, cover, and simmer for about 35 – 40 minutes, or until the broccoli stems are soft.
  5. If you have an immersion blender, purée the soup in the pot. If using a food processor, strain the soup, reserving the liquid and returning it to the pot. Turn the contents of the strainer into the work bowl of the food processor. The processor should be fitted with the metal blade. Purée, using off/on pulses, then return the purée to the liquid in the pot. Stir together. If you want to freeze the soup, do so at this point, before you add the milk.
  6. Stir in the evaporated milk and season to taste with salt and pepper.

Carrot_good_3

Carrot Soup

Button-PrintVersion-LowRes

  • Serves: 6
  • Hands-on Time: 10-15 minutes
  • Cooking: 45 minutes

Ingredients:

  • 5 large carrots, trimmed, peeled, and cut into 2 cm disks or pieces
  • 2 large potatoes, peeled, and cut into several chunks
  • 2 medium onions, peeled and coarsely chopped
  • 2 tbsp. butter, margarine, or olive oil
  • 4 cups of no salt added chicken broth
  • 2 tsp. dried thyme
  • 1 tsp. salt
  • ½ tsp freshly ground black pepper
  • One, 354 ml can of evaporated milk
  • salt and pepper, to taste

Steps:

  1. In a large saucepan or Dutch oven, heat the butter (or margarine or oil), add the chopped onions and sauté until they are soft and translucent but not browning.
  2. Add the prepared carrots and potatoes and sauté for another 5 minutes.
  3. Add the thyme, 1 tsp. salt, ½ tsp. freshly ground pepper, and broth to the vegetables and bring to a boil. Cover, reduce the heat and simmer for 45 minutes or until the vegetables are very soft and tender.
  4. Use an immersion blender to purée the soup. Alternatively, strain the soup, reserving the liquid in the pot and placing the vegetables in a food processor or blender for puréeing. Return the puréed vegetables to the pot with the broth and stir to combine. If you want to freeze the soup, do so at this point before the milk is added.
  5. Stir in the evaporated milk. After the milk has been added, be careful not to let the soup boil.
  6. Taste, and adjust seasonings if necessary.

Variations:

  • Use beef or vegetable broth, or water in place of the chicken broth.
  • You can replace the thyme with a teaspoon or so of curry.
  • You can replace the evaporated milk with coconut milk or water for a vegan friendly soup.

Turkey_good_2

Turkey Soup

Button-PrintVersion-LowRes

This is my favourite soup for using my own homemade turkey or chicken broth. Of course, you can also use store-bought broth which I often do. The recipe makes a large pot of soul-satisfying soup that freezes well.

  • Serves: 12+
  • Hands-on Time: 20 minutes
  • Cooking: 34-54 minutes

Ingredients:

  • 3 medium onions, peeled and very roughly chopped
  • 2 large carrots, peeled and cut into 1 inch pieces
  • 2 celery ribs, cleaned and cut into 2 inch pieces
  • ½ cup butter
  • 1 cup all-purpose flour
  • 3 quarts of turkey or chicken broth, homemade or commercial*
  • 4 cups turkey or chicken meat, removed from the soup bones and cut into bite size pieces**
  • 1 cup uncooked long grain rice (either white or brown; I usually use brown)
  • 2 tsp. salt
  • 1 tsp. chicken bouillon granules
  • ¾ tsp. freshly ground black pepper
  • One, 354mL can evaporated milk (add enough regular milk to the evaporated milk to have 2 cups worth of milk)

Steps:

  1. Blitz the onions, carrots, and celery in a food processor until they are close to finely chopped, but not quite – and certainly not minced or puréed. You may have to do this in batches, depending on the size of your processor. You can also finely chop the veggies by hand.

    Turkey - Process
    Vegetables – Properly chopped
  2. In a large pot or Dutch oven, melt the butter. Add the prepared vegetables and sauté them until tender. Reduce the heat and stir in the flour so that it is well combined. Gradually stir in 1 quart of the broth. Bring to a boil and cook, stirring constantly, until thickened – 3 to 4 minutes.
  3. Add the remaining ingredients, except the evaporated milk, reduce the heat, and simmer, covered, for 45 to 50 minutes or until the rice is tender. The cooking time will be about 30 minutes if you are using white rice.
  4. Stir in the 2 cups of milk. You can freeze this soup with the milk in it.

*When using store-bought broth, buy the no or sodium reduced type in the 1 litre carton. A little short of homemade broth? Make up the difference with water and increase the amount of chicken bouillon granules by ½ tsp.

** If you don’t have leftover cooked meat, either cook 2 chicken breasts or 6 thighs, 4 turkey thighs, or get a cooked rotisserie chicken.

All Soups_good_end

How I Came By My Obsession

4by6.dscf7019

Button-JumpToRecipe

I come by my recipe obsession honestly. I don’t know about generations far past, but both my grandmothers were recipe collectors. Each had a small top drawer in the kitchen where they kept recipes neatly clipped, glued or taped into a newsprint notebook or captured in a large, plain brown envelope.

nain2
Nain – an excellent cook.

My Nain was an excellent cook. Nain is the Welsh word for grandmother and what we called my mother’s mother as she came to Canada from Wales and to differentiate her from my father’s mother, Granny Rankin. In my mind, another significant difference between the two was their ability to cook; where Nain succeeded, Granny…tried. Nain even managed standing rib roasts so that at one end these roasts would be fairly well done – as my grandfather preferred – while the other end was rare, as the rest of the family loved. I’m not quite sure why Granny collected recipes – she was a terrible cook. She was so bad that she had a door installed by her stove on the end wall of the kitchen so that she could throw things that had caught fire out into the yard. You never knew when the door would jerk open and a flaming saucepan would come flying out. As children, my sister and I learned to give this door a wide berth. What can I say? One grandmother entertained with glorious food she had prepared herself; the other called Simpson’s Arcadian Court to cater. While my grandmothers neatly cut out their recipes, my own mother, more pressed for time, ripped whole pages out of magazines and newspapers which she eventually organized into file folders.

portrait
Granny Rankin…tried.

My grandmothers didn’t have a collection of cookbooks. Nain owned one cookbook, given as a Christmas present the year it first came out, The Joy of Cooking. I now have this volume in my collection, complete with its instructions on How to Skin a Weasel. My mother had a small collection of about ten to fifteen cookbooks.

Then there’s me. I did none of these things. Cookbooks, cooking magazines and collected recipes by the box full over-run my house: tucked behind chairs and doors, filling bookcases, stacked by beds, corralled into binders and copied into notebooks. Now, where did I see THAT recipe?

In an effort not to lose track of recipes that work for me (at least as a starting point), my current approach is to record them in a small loose leaf recipe binder and annotate them as I work on them. At other times I’ve had to phone people I know I gave a recipe to in the hopes they can lay their hands on it, which, thankfully, they usually can.

topdown
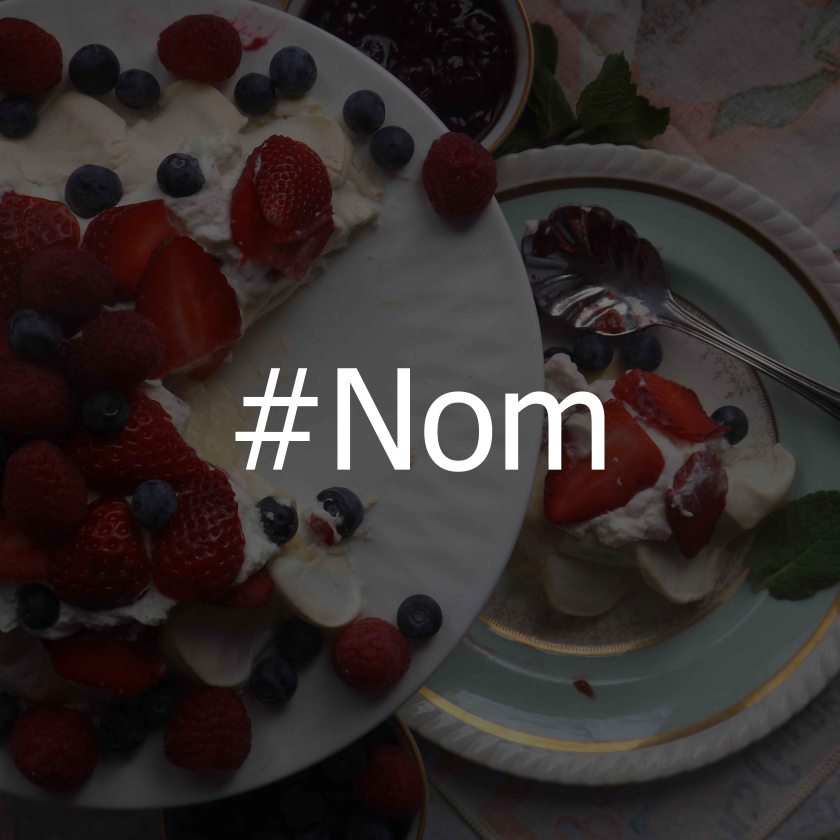
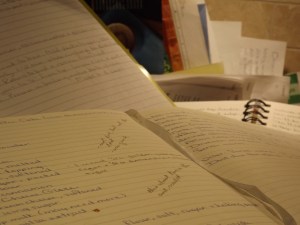
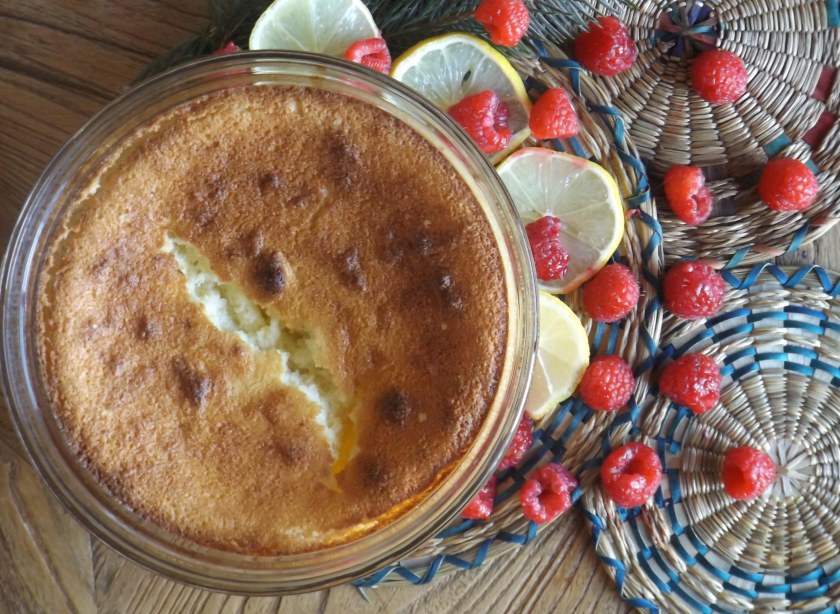
Some of my grandmother’s recipes that I really can’t do without are written on the end pages of one of the first cookbooks that I purchased for myself, The Fannie Farmer Baking Book, when I moved into my first apartment. Of those, the one that I return to most often is Nain’s Lemon Pudding. It is light, fresh, and deliciously lemon. I like to serve it warm with a scoop of frozen vanilla yogurt.

4by6.dscf7044

Nain’s Lemon Pudding

Button-PrintVersion


  • Serves: 6
  • Hands-on Time: 20 minutes
  • Baking and Cooling: 1 hour 45 minutes

Ingredients:

  • 4 large eggs, separated
  • ¼ c butter or margarine, softened
  • 1 ½ c granulated sugar
  • ¼ c all-purpose flour
  • 2c milk
  • Grated zest of one lemon
  • ½ c lemon juice

Steps:

  1. Preheat the oven to 350F. Lightly grease a deep, 1 ½ quart casserole or soufflé dish. Set aside.
  2. Separate the eggs, placing the whites in a large metal or glass bowl and the yolks in a small bowl. Set aside.
  3. Beat the butter and sugar together until well blended and fluffy – about 3 minutes.4by6.dscf6847
  4. Beat the 4 egg yolks into the butter/sugar mixture.
  5. Blend in the flour and the milk.
  6. Stir in the lemon zest and juice.
  7. With clean beaters or a metal whisk, beat egg whites until they form soft peaks. Carefully fold the whites into the lemon mixture. 

    This slideshow requires JavaScript.

  8. Gently pour the pudding into the prepared baking dish.
  9. Place a water tight pan on the middle rack of the oven. The pan should be big enough to hold the baking dish with the pudding. Place the baking dish in the pan and then pour one inch (2 ½ cm) of boiling water into the pan, being careful not to get any into the pudding. 

    This slideshow requires JavaScript.

  10. Bake for 1 hour and 15 minutes or until the top is golden brown and a thin knife inserted in the centre comes out clean. Let sit for at least 30 minutes before serving. The pudding can also be easily reheated by placing it in a low oven while dinner is being eaten if it has cooled completely and you want to serve it warm. If I’ve had the oven on for the main course, I just place the pudding in the turned off oven while we eat. No need for the water bath at this point. 

    This slideshow requires JavaScript.


wlgyl


“Tis an ill cook that cannot lick his own fingers”

Button-JumpToRecipeI am recipe obsessed – continually in search of the recipe that yields a taste sensation; that has you thinking about its blending of flavours; and that leaves you dying for just one more taste.

4by6.IMG_0204

My obsession includes a collection of some one thousand cookbooks, stacks of cooking magazines, and boxes, files, and notebooks crammed with recipes. Recently retired (I was a teacher), I can now indulge my passion further by actually ferreting out the best tastes in my collection; or, if need be, developing the best. As William Shakespeare put it, “Tis an ill cook that cannot lick his  [or her] own fingers.”

This blog is a record of my adventures and experiments in finding the ultimate recipe for…

Beginnings

I began my cooking experiments as a three year-old by dumping flour, oats (and everything else at hand in the bottom cupboard) into the middle of my grandmother’s kitchen floor and stirring them together. I am told there was no bowl or other container involved. Granny thought I was very clever; my mother not so much.

Notebooks

My other grandmother had some of her baking fall victim to my experiments with the dials on the front of her stove. She, however, had the wisdom to recognize a budding interest in cooking. She set about teaching me how to stir so ingredients stayed in the bowl. I also learned that there was an order in how things went together, and how things tasted (yummy or yucky). Once I could read, she taught me how to understand a recipe, measure carefully and, most importantly, to think about taste and texture and what I was aiming for. I began to develop pretty strong technical skills and was not frightened of trying new recipes, even those deemed difficult. By the time I was twelve my mother had me making soufflés for a ladies’ luncheon.

During the 1980s I spent a lot of time at Bonnie Stern’s School of Cooking. It was there that I really began to expand my taste experiences and consider the new flavours and ingredients that were flooding Toronto’s culinary scene. Bonnie’s recipes always provided that jolt to the taste buds, that  “there’s the taste I was missing” experience. It was also where my obsession with recipes began; the search for the very best tasting recipe for whatever dish had captured my attention.

The Chocolate Chip Cookie

In the last few years that I was teaching, our school staff included a number of foodies and a social convenor who set up several staff bake-offs. The first of these I entered was for the best chocolate chip cookie.

cookie - tray

It so happens that the perfect chocolate chip cookie was one of my first food obsessions. In the 1970s there used to be a Dutch bakery on the east side of Church Street just south of Wellesley, close to where I was working for the summer. Their chocolate chippers had a wonderful “tingle” of some subtle flavour in the background. It took me a long time to identify the ingredient – even now, I’m not sure, but almost certainly it was mace– and it became my secret ingredient too.

For the bake-off I seriously began experimenting with add-ins to my cookie dough. About eight variations later I had what my family thought was the best: a dough that contained not only mace but also orange zest and espresso powder. Intriguing, more sophisticated, not too sweet – and really good! (But not a winner – they came second.)

Cookies - Orange Peel

Recently Scandinavian baking has been capturing my attention. It has given me some new ideas to try with my chocolate chip cookie dough. I have introduced some rye flour and the zest of a whole orange for taste. In an old note book, I have a version that adds corn flakes (another uses Rice Krispies). I decided to try Frosted Flakes to add to the crunch. Further experiments have yielded some great variations, the overall favourite being one that included homemade candied orange peel (more about that in another post). Whatever the choice, you end up with a large, rustic-looking and utterly delicious chocolate chip cookie. One obsession down.

This is a very easy recipe to play around with. You can switch the cereal to another crispy variety; you can use all-purpose flour instead of the rye; if you love coffee flavour, increase the amount of espresso by ½ to 1 tsp; not fond of orange  – leave the zest out. In developing this particular take on a chocolate chip cookie, I found that Kellog’s brand of Frosted Flakes is sturdier than store brands and maintains a somewhat better crunch when mixed in. This dough is best mixed with a stand mixer but can also be made with a hand held electric mixer or even by hand with a wooden spoon as no long periods of beating are required. If mixing with something other than a stand mixer, you might want to crush the cereal somewhat before adding it to the dough. The paddle or beaters of a stand mixer will crush the cereal for you.

Cookies - Stack- Narrow


Cookie Banner

(Makes 24 large cookies)

Button-PrintVersion

  • Hands on Time: 10-15 minutes
  • Chilling and Baking Time: 1 hour 13 min

Ingredients:

  • 1 ¼ c all-purpose flour
  • ½ c dark rye flour
  • ½ c butter, (either salted or unsalted), softened
  • ½ c granulated sugar
  • ½ c brown sugar (light or dark), firmly packed
  • 1/3 c canola oil
  • Grated zest of 1 orange
  • 1 tsp espresso granules
  • 1 large egg
  • 1 tsp vanilla extract
  • 1 tsp salt
  • ½ tsp baking soda
  • 2 c Frosted Flakes
  • 1 1/2c semi-sweet chocolate chips

Steps:

  1. Combine the all-purpose and rye flours in a bowl and set aside. Line two cookie sheets with parchment paper and set aside. One of the sheets will be used for chilling the cookies.
  2. In a large bowl combine the butter and the granulated and brown sugars. Beat until well combined.
  3. Beat in the oil to combine.
  4. Add the orange zest and the espresso powder and mix in. I grate the orange zest directly into the bowl using a micro-plane so that none of the flavour in the peel is lost.
  5. Add egg and vanilla. Mix well.
  6. Sprinkle the salt and baking soda over the surface of the dough, then mix in well.
  7. Add the flour mixture to the sugar/butter/oil mixture all at once and mix just until combined.
  8. Add the cereal and chocolate chips and mix just to distribute through the dough.
  9. Scoop the dough in 2 tbsp balls and place on one of the parchment lined cookie sheets. As the cookies are going into the refrigerator to firm up, they do not have to be spaced far apart. All 24 cookies can go on one sheet. Cover with plastic wrap and refrigerate for one hour.
  10. Just before the hour is up, preheat the oven to 350F.
  11. Remove cookies from the refrigerator. Place 12 of the cookies on the second prepared cookie sheet, spread out about 1 ½ inches apart. Bake this sheet first. Reposition the remaining cookies on first sheet and set aside. Bake cookies for about 13 minutes or until they have a light, golden colour. Allow to cool on the cookie sheet for 10 minutes and then remove to a wire rack to cool completely (if they don’t get consumed first).

Variations:

  1. Replace rye flour with unsweetened cocoa powder.
  2. Substitute chopped, candied orange peel for the chocolate chips.
  3. Use a combination of chopped, candied orange peel and chocolate chips in either the rye or the cocoa flavoured doughs.
  4. Substitute a Terry’s Chocolate Orange, coarsely chopped, for the chocolate chips.
  5. Use mini-chocolate chips in place of regular sized chips in any of the variations.

Cookies - Bake