
 |
 |
 |
The last few days have been the kind of winter cold that makes me long for a nice hot soup. I love soup. When I was doing my Bachelor of Education at York University, I think I had soup every day for lunch. At least I had it often enough that it became a bit of a class joke. I, however, came to realize what a soul-satisfying source of nourishment soup can be.
Childhood: The Canned Years
As a child, I only remember ever having Campbell’s canned soup and at the skating rink learned what I, at the time, thought of as a really risque rhyme:
Campbell’s soup makes you poop,
Down your leg and in your boot.
My Nain made the most delicious soup of my childhood but even she started with a can. And that can was Campbell’s Cream of Mushroom Soup, which she combined with her own homemade chicken or turkey broth. It was so good and, if I’m making soup from a can, which is rare, it is what I still do.
Adulthood: The Dawn of True Soup
I don’t think I had a truly homemade soup before taking the “Soup, Salad, and Muffins” course at Bonnie Stern’s cooking school and what a revelation! I found that making soup from scratch does not have to take a lot of time and, minute for minute, yields the most bang for your buck of anything produced in the kitchen.

Homemade soup is so easy and can be rustled up from ingredients you likely already have in your refrigerator or pantry. It works just like the Stone Soup in the classic children’s story. I have been making soup from scratch ever since that eye opening Bonnie Stern class. I have also found that soup has connected me to others in some …odd…(and wonderful) ways.
I Soup Therefore I Am

I have also discovered that others are interested in soup as well. Once in 1995, when I arrived in the schoolyard to pick-up my daughter, Deanna, from kindergarten, her teacher came hurrying down the steps to ask me about my chicken soup recipe that Deanna had been raving about. Goodness knows what a five year old can say about soup to arouse such interest, but I had to tell the teacher that this most wonderful soup was Lipton’s Chicken Noodle dry soup mix. (At that stage in her life, Deanna had a strong preference for processed foods). LOL.
Another time, the creator of the food show that used to be held on the CNE grounds, was looking for some sure-fire, nutritious recipes to include in their promotional materials and approached me. She hoped that I, as the mother of five and a recognized neighbourhood good cook, might have something that would fit the bill. My Carrot Soup recipe was the first thing to spring to mind; its almost impossible to get wrong, very nutritious, and an excellent way to sneak other vegetables past the picky eaters which some children can be. And, so a soup came to be my first officially published recipe.

Over the years, soup and the act of making soup has provided the medium for some great learning and community building experiences. I made Stone Soup with my own kids using the recipe from the story. We would begin by finding a good stone on our way home from school. Once we found a stone that we liked I would give it a good scrub, then boil it for 15 minutes and allow it to cool before starting the soup. After rummaging through the fridge for ingredients we would simmer the ingredients and then puree the soup for a thickened liquid and voilà. Fun Fact: The rock adds nothing, but it managed to trick Deanna into eating a healthy soup. I later made this soup with the children in my classrooms because with Stone Soup, the more that goes into the pot, the better the soup.

In my MumNet group we chopped veggies and made Ribollita to take home while reconnecting after a break.
For the past few years a friend of mine has been active in organizing a group of us from the neighbourhood to make soup in support of Soup Sisters – an organization that provides warm soup to women in shelters and hostels. Most of us met years ago as young mothers with kids at the same school and the soup making has been a great way to touch base now that we’ve evolved beyond the school yard. As we chat and chop away an evening under the guidance of several chefs and soup experts, we produce gallons of soup.
When my mother and mother-in-law were ill and unable to eat most things, especially solids, homemade soup was the answer and for several years I was making batches of soup up to three times a week and sending it out in big, plastic juice jugs.
I can truthfully say that a river of soup runs through my life.
Soup 101

No recipe is required to produce a good soup. At the very least you need water and one other ingredient (and a stone if you’re making that soup). Obviously this will not yield the soup of your dreams.
Soup is the most forgiving thing you can make in the kitchen, allowing you to play endlessly with flavour combinations and textures. About the only rule has to do with the quality of your ingredients. You do not need pristine produce for soup. However, your vegetables cannot have one foot in the disposal bin. As they used to say in the computer world, garbage in, garbage out.
An immersion blender is your best friend in soup making. It allows you to purée your soup right in the pot without having to transfer the hot liquid to a food processor or blender. The only time I forgo the immersion blender is when I want a flawlessly smooth soup. Then, I use a blender or force the soup through a fine sieve – achieving a smoothness that not even a food processor can accomplish. With the immersion blender I just have to shove the wand around the soup in its pot until all the chunks are reduced to a purée. Just be careful to keep the head submerged; otherwise it will splatter the hot soup all over the place.
Over the years I have developed a basic formula for creating a soup that will not fail to satisfy. It goes like this:
- 1 tbsp. of butter or oil (any type)
- 1 onion, coarsely chopped
- 1 potato, peeled and coarsely chopped
- 3 cups vegetable of choice, coarsely chopped
- 1 litre of broth (salt reduced or no salt chicken, beef, or vegetable)
- 1 can evaporated milk (regular or fat reduced)
- Herbs (fresh or dried) and/or spices to compliment your featured vegetable. For ideas, think of classic combinations or tastes that you have enjoyed when added to your featured vegetable.
- Salt and pepper, to taste
With these ingredients you then:
- In a large saucepan or Dutch oven, over medium heat, melt the butter or oil and sauté the onions until softened and translucent.
- Add the potato and other vegetables and cook for about 5 to 7 minutes, stirring every so often.
- Add the broth. If the broth does not cover the vegetables, add enough water to just cover. Bring to a boil, place a lid on the pot, reduce the heat, and simmer until vegetables are soft – 35 to 45 minutes.
- Purée, using the means of your choice, the vegetable/broth mixture. If you like some texture in your soup, leave some chunky bits.
- Stir in the evaporated milk. If the soup is too thick, add some additional milk (any kind) or water to thin it out.
- Add herbs and/or spices, to taste. You can use either fresh or dried herbs depending on what you have on hand. The rule of thumb is to use half as much of a dried herb as you would fresh. I usually start with a tablespoon of a finely chopped fresh herb or 2 tsp. of a dried herb. For spices, with the exception of hot spices such as cayenne, I add 1 tsp. at a time until I like the result.
- Add salt and pepper, to taste.
The combinations of things you can do with this basic formula are endless. If you want to add an additional step, you can roast your vegetables before making the soup. This will result in more depth of flavour and will also reduce the cooking time of the soup.
You can substitute any type of cream (from coffee cream to whipping cream) for the evaporated milk for a richer soup. Because of concerns about the fat content of cream, I eliminated it in favour of evaporated milk that provides a better sense of richness and creaminess than a straight milk substitute does.
I also discovered that silken tofu can be hidden in the soup without affecting its taste or texture by pureeing it in with the other soup ingredients. It’s a great way to up the protein and nutritional value of the soup without having someone object that they won’t eat tofu. Hello Canada’s new Food Guide!
The soup, prepared up to the end of step 4 can be packed in freezer bags and frozen for up to three or four months.
Two of my three “go to” soup recipes follow the Soup 101 formula; they are the broccoli and carrot soups below. As you’ll see, with the turkey soup, I’ve provided something a little different but no more difficult and just a little bit more time consuming – but so worth it. Soup’s On!

Broccoli Soup

All the chopping for this soup can be done in a food processor or by hand. I make the soup up to the end of step 4 and then freeze it (up to 3 months). Once defrosted, I then stir in the evaporated milk. For a richer and more caloric soup you can substitute 3/4 cup heavy cream – or other cream – for the milk. If you are using evaporated milk or a cream lighter than 35%, be careful not to let the soup boil as the dairy can curdle.
- Serves: 6
- Hands-on Time: 10-15 minutes
- Cooking: 35-40 minutes
Ingredients:
- 1 large onion, coarsely chopped
- ¼ cup unsalted butter or margarine
- 1 ½ lbs. broccoli (about 1 large bunch), trimmed
- ¾ cup fresh parsley, coarse stems removed
- ¾ cup fresh dill, coarse stems removed
- 4 cups chicken broth
- 1/8 tsp. Grated nutmeg
- ½ tsp. salt and pepper
- One, 354 ml can evaporated milk
Steps:
- Peel and coarsely chop the onion.
- In a large saucepan or Dutch oven, melt the butter or margarine and, over a medium heat, sauté the onion until it is soft and translucent.
- While the onions are cooking, trim the broccoli. Remove any little green leaves and cut off the florets high up the stems. Peel the lower stems, discarding the tough ends, and chop them coarsely. Add the broccoli to the onions and continue to sauté gently while you prepare the parsley and dill.
- Finely chop the parsley and dill. You can combine them and chop both at the same time. Add to the onions and broccoli. Add the broth, nutmeg, and about ½ tsp. each of salt and pepper. Bring to a boil, reduce heat, cover, and simmer for about 35 – 40 minutes, or until the broccoli stems are soft.
- If you have an immersion blender, purée the soup in the pot. If using a food processor, strain the soup, reserving the liquid and returning it to the pot. Turn the contents of the strainer into the work bowl of the food processor. The processor should be fitted with the metal blade. Purée, using off/on pulses, then return the purée to the liquid in the pot. Stir together. If you want to freeze the soup, do so at this point, before you add the milk.
- Stir in the evaporated milk and season to taste with salt and pepper.

Carrot Soup
- Serves: 6
- Hands-on Time: 10-15 minutes
- Cooking: 45 minutes
Ingredients:
- 5 large carrots, trimmed, peeled, and cut into 2 cm disks or pieces
- 2 large potatoes, peeled, and cut into several chunks
- 2 medium onions, peeled and coarsely chopped
- 2 tbsp. butter, margarine, or olive oil
- 4 cups of no salt added chicken broth
- 2 tsp. dried thyme
- 1 tsp. salt
- ½ tsp freshly ground black pepper
- One, 354 ml can of evaporated milk
- salt and pepper, to taste
Steps:
- In a large saucepan or Dutch oven, heat the butter (or margarine or oil), add the chopped onions and sauté until they are soft and translucent but not browning.
- Add the prepared carrots and potatoes and sauté for another 5 minutes.
- Add the thyme, 1 tsp. salt, ½ tsp. freshly ground pepper, and broth to the vegetables and bring to a boil. Cover, reduce the heat and simmer for 45 minutes or until the vegetables are very soft and tender.
- Use an immersion blender to purée the soup. Alternatively, strain the soup, reserving the liquid in the pot and placing the vegetables in a food processor or blender for puréeing. Return the puréed vegetables to the pot with the broth and stir to combine. If you want to freeze the soup, do so at this point before the milk is added.
- Stir in the evaporated milk. After the milk has been added, be careful not to let the soup boil.
- Taste, and adjust seasonings if necessary.
Variations:
- Use beef or vegetable broth, or water in place of the chicken broth.
- You can replace the thyme with a teaspoon or so of curry.
- You can replace the evaporated milk with coconut milk or water for a vegan friendly soup.

Turkey Soup
This is my favourite soup for using my own homemade turkey or chicken broth. Of course, you can also use store-bought broth which I often do. The recipe makes a large pot of soul-satisfying soup that freezes well.
- Serves: 12+
- Hands-on Time: 20 minutes
- Cooking: 34-54 minutes
Ingredients:
- 3 medium onions, peeled and very roughly chopped
- 2 large carrots, peeled and cut into 1 inch pieces
- 2 celery ribs, cleaned and cut into 2 inch pieces
- ½ cup butter
- 1 cup all-purpose flour
- 3 quarts of turkey or chicken broth, homemade or commercial*
- 4 cups turkey or chicken meat, removed from the soup bones and cut into bite size pieces**
- 1 cup uncooked long grain rice (either white or brown; I usually use brown)
- 2 tsp. salt
- 1 tsp. chicken bouillon granules
- ¾ tsp. freshly ground black pepper
- One, 354mL can evaporated milk (add enough regular milk to the evaporated milk to have 2 cups worth of milk)
Steps:
- Blitz the onions, carrots, and celery in a food processor until they are close to finely chopped, but not quite – and certainly not minced or puréed. You may have to do this in batches, depending on the size of your processor. You can also finely chop the veggies by hand.
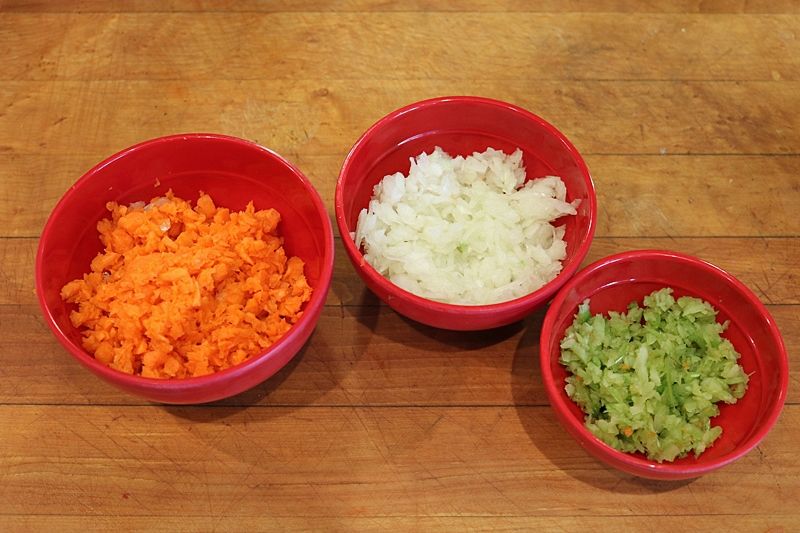
Vegetables – Properly chopped - In a large pot or Dutch oven, melt the butter. Add the prepared vegetables and sauté them until tender. Reduce the heat and stir in the flour so that it is well combined. Gradually stir in 1 quart of the broth. Bring to a boil and cook, stirring constantly, until thickened – 3 to 4 minutes.
- Add the remaining ingredients, except the evaporated milk, reduce the heat, and simmer, covered, for 45 to 50 minutes or until the rice is tender. The cooking time will be about 30 minutes if you are using white rice.
- Stir in the 2 cups of milk. You can freeze this soup with the milk in it.
*When using store-bought broth, buy the no or sodium reduced type in the 1 litre carton. A little short of homemade broth? Make up the difference with water and increase the amount of chicken bouillon granules by ½ tsp.
** If you don’t have leftover cooked meat, either cook 2 chicken breasts or 6 thighs, 4 turkey thighs, or get a cooked rotisserie chicken.


 For years I have read and enjoyed the food writing and recipe development of America’s Test Kitchen. While I haven’t always agreed with what they’ve deemed the definitive version of whatever, I have been drawn to their methodology. Now I am determined to give it a go myself, wondering how many pear cakes it would take me to reach perfection (or cause a family revolt: “Not another pear cake!”).
 Recalling a coffee cake recipe that had the baker fold lemon curd into the cake batter, I made a thick pear sauce (reminiscent of apple sauce) and folded it into the cake batter of the original recipe. I increased the amount of flour by a few tablespoons to compensate for the extra moisture and then stirred in the chopped pear. When the cake came out of the oven, it looked promising. When cut, the texture was fine, the over-all appearance enticing. But the pear taste? Still wasn’t there. What next?
 One last change – another “hit” of pear was needed to carry the taste from the top to the bottom of the cake. I’d learned that to be tasted, the pears inside a cake were best layered together rather than folded in. But I couldn’t use rock-hard pears in the middle of the cake and I wasn’t prepared to fuss around with coordinating pears of two degrees of ripeness nor was I prepared to go to the trouble of poaching the pears separately. After all, you reach a point where the whole baking project becomes too much effort. My solution? Canned pears because they are tender but maintain their shape in baking when well drained.