
Chicken has always been one of my favourite meats. I could happily eat it every dinner, week after week, for quite a long time. Chicken’s versatility allows it to be transformed into an entirely different taste experience with each meal.
Oddly enough chicken wings have never really captured my attention or appetite until quite recently – at the instigation of my youngest son who frequently orders wings when they’re on a menu. I’ve possibly been put off by the fact that most restaurant wings are deep fried. While I own a deep fryer and several deep skillets that are perfect for shallow deep frying, I just don’t like the idea of all that combustible hot oil, all the splatter, and all the oily smell that comes with fried food. And that isn’t even taking the health considerations into account! It’s not that I won’t ever eat fried foods, I really enjoy them on occasion, but I am happy to leave the frying to a restaurant.
Then, a couple of summers ago, when collaborating on the food for a multi-family cottage dock party, I found myself inexplicably exploring the idea of chicken wings as a possible contribution. Now, I didn’t want to go through the hassle of deep frying chicken wings and I didn’t want to go with store-bought, frozen wings. In my taste-imagination I envisioned wings with Asian flavours that would make my taste-buds sit up and pay attention. I also wanted a wing recipe that could be made ahead. The wings would have to taste great whether hot, warm, or at room temperature, and not require a drippy dipping sauce that might land in the hosts’ carpet. So…
After combing through what seemed like hundreds of recipes and approaches, I found one baking method on the internet that promised a tasty, crispy wing that could be combined with any glaze or sauce desired. It involved dusting the wings with a spiced-up flour mixture, rolling them in melted butter, and then baking them in a hot 425F oven. Although I had reservations about rolling the wings in butter, they did come out quite crispy and good. Once I had coated them with my glaze and given them another brief bake, they were what I had been aiming for in my taste-imagination. So I made ten pounds of them!

Last fall, when I was cruising around the various cooking websites and blogs, I stumbled across a recipe for the “the crispiest ever” chicken thighs (at ifoodblogger.com). This rub recipe included baking powder as an ingredient. Here was something new and totally different that I had never come across before!
Achieving a crisp skin involves drawing out moisture which is why recipes often tell you to pat the meat dry and sprinkle with salt and pepper before placing it in a hot pan. The patting and salt help to dry the surface of the meat in advance of cooking and helps the browning and crisping process. Ever since I discovered that baking powder is a drying agent it has become a necessary part of any rub I make for chicken because it improves immeasurably the crispiness of the chicken skin. And, if you are going to indulge in eating the skin, it might as well be worth the fat and calories right? And, no, you don’t taste the baking powder.
With chicken wings, it is not a case of eliminating skin and subcutaneous fat (some of which is rendered during baking) but rather one of not adding fat by rolling the wings in butter or deep-frying them. I decided to try making a baking powder rub for my wings to see if they would crisp-up satisfactorily and met with great success on the first try (one for the history books). The wings were even crispier than those that I had rolled in butter and I detected no loss in flavour, juiciness, or tenderness. I now had a basic approach to wings that was not only easy, but could also be switched up and played with depending on the desired flavour profile. I have started keeping a jar of the basic rub at hand for speedy preparation of skin-on chicken pieces that I want to come out of the oven baked to perfection. Although I haven’t actually tried it, I see no reason why a tablespoon or so of baking powder couldn’t be added to any favourite rub.
I also discovered that baking the wings can affect the end result and have found that two approaches are the best. The method I use will depend on the oven I’m cooking in. Both methods are very similar, the basic preparation being the same. The main differences are the time required for cooking and the type of oven used. Method 1 is the quickest but requires a convection oven function to move the hot air up and around the wings. Method 2, by contrast, takes a longer cooking time but produces the same results as Method 1 using a standard oven.

Orange Ginger Chicken Wings

- Serves: 6-8
- Time:
- Wings – Approx. 35 min for trimming.
- Rub – 5 min.
- Glaze – 35 min.
- Baking – 42-87 min.
General Ingredients:
- 5 lbs (2.25 kg) chicken wings
Basic Rub Ingredients:
- 1 tbsp baking powder
- 1 tsp Kosher salt
- 1 tsp freshly ground black pepper
- 4 tsp ground ginger
- 3 tsp Chinese five spice powder
- 1 tsp garlic salt or ½ tsp garlic powder
- pinch cayenne pepper
Orange Ginger Glaze Ingredients:
- 4 cloves garlic, finely minced
- 4 tsp olive or vegetable oil
- 1 ½ cups hoisin sauce
- 1 ½ cups orange juice (can be fresh or a pure, without preservatives commercial brand)
- zest of 3 oranges
- 6 tbsp finely grated ginger root
- 3 tsp low sodium soy sauce
- 6 tbsp brown sugar
- 1 tsp freshly ground black pepper
- 1 tsp Chinese five spice powder (optional)
- Basic Rub:
Put all ingredients in a small bowl and mix well to combine. To change the flavours in the rub, start with the baking powder, Kosher salt, and black pepper and then add the spices and/or herbs that you desire for a total combination of about 8 tsp (unless you are using hot pepper spices like cayenne – then use a little all-purpose flour to make up the 8 tsp once you have your desired level of spiciness).
- Orange Ginger Glaze:
- Place the oil and minced garlic in a small saucepan and sauté the garlic over medium heat until it is softened but not browned.
- Add the remaining ingredients and simmer slowly for 15 – 20 minutes, until the mixture is reduced in volume by about a half and is thick enough to coat the back of a wooden spoon. Set aside. The glaze can be made a day or so ahead and stored in the refrigerator until needed. Warm before using.
- The Chicken Wings:
- If you have whole wings that have not already been trimmed you will start by doing this. It is the most time-consuming part of the preparation. You will see that the wing divides naturally into three sections: the lower part that is almost like a mini drumstick, the centre section, and the thinner wing tip. There is a joint between each section. Separate the end of the wing from the middle by cutting through the joint. Separate the middle section from the tip by cutting through this joint. Discard the wing tip as it is all skin and bone and no good for eating. Reserve the other two sections. Repeat this process with each wing. It is a real time saver if you buy wings with this work already done for you.
- Cook the wings:
- Cooking Method 1 (for a convection oven):
- Preheat the oven to 450F (non-convection mode).
- Line a rimmed baking sheet with foil and place a wire rack on top. Either spray the rack with a non-stick cooking spray or brush with oil.
- Dry the wing pieces well with paper towels.
- Coat pieces well with the rub mixture. You can do this by either rubbing each piece individually with the rub mixture or you can place all the pieces in a Ziploc bag, dump the rub in on top, and shake vigorously until the pieces are well covered.

“ay, there’s the rub!” - Place the prepared wings on the rack, skin side up, in a single layer. It’s okay if the pieces are touching.
- As you place the wings in the oven, switch to the convection function at 425F and bake for 35 minutes.
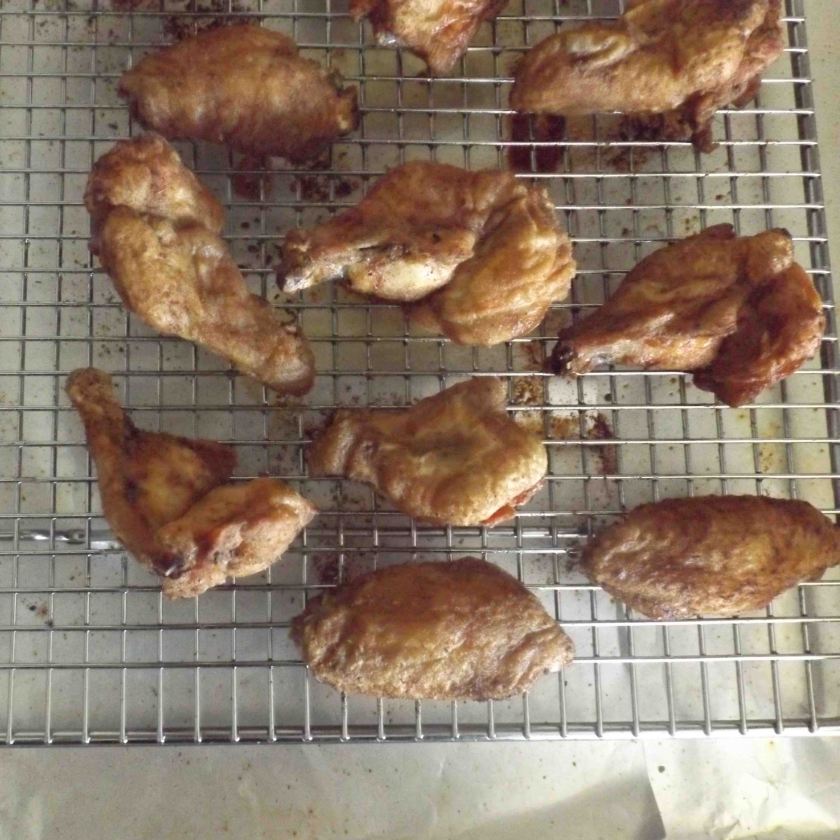
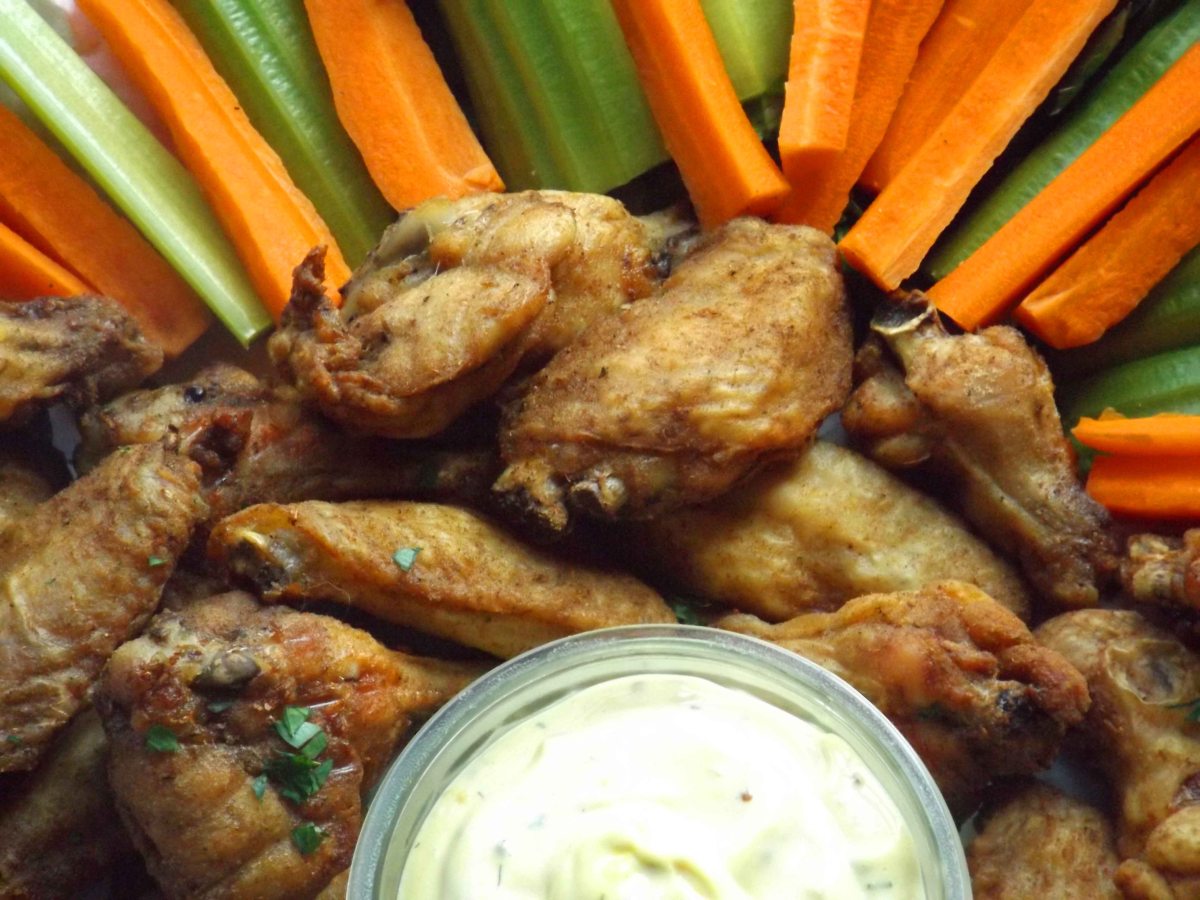
Baked wings without glaze - Remove the wings from the oven but leave the oven on. Place the wings in a heatproof bowl (they could melt a plastic bowl) and coat with the desired glaze. You will only need about half the glaze to sufficiently coat the wings. Use any remaining glaze as a dip, if desired.
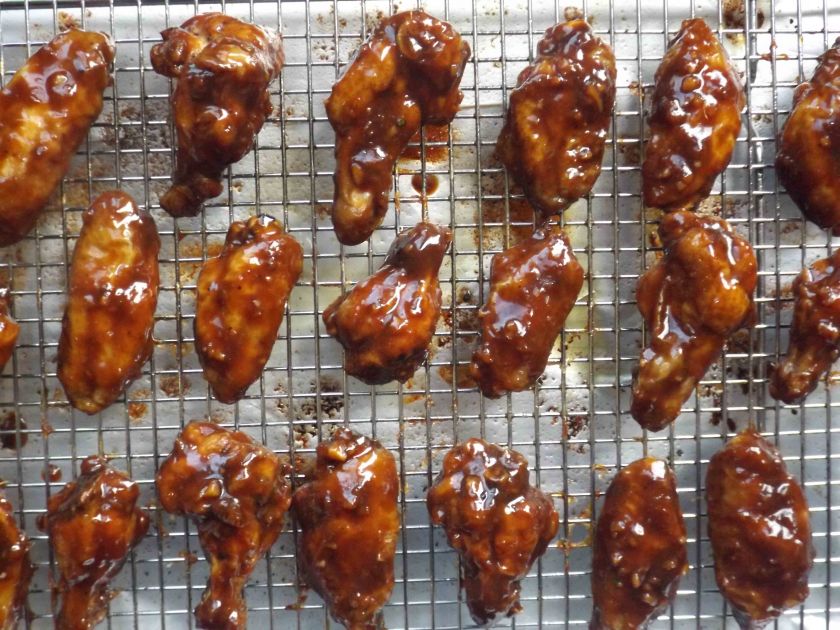
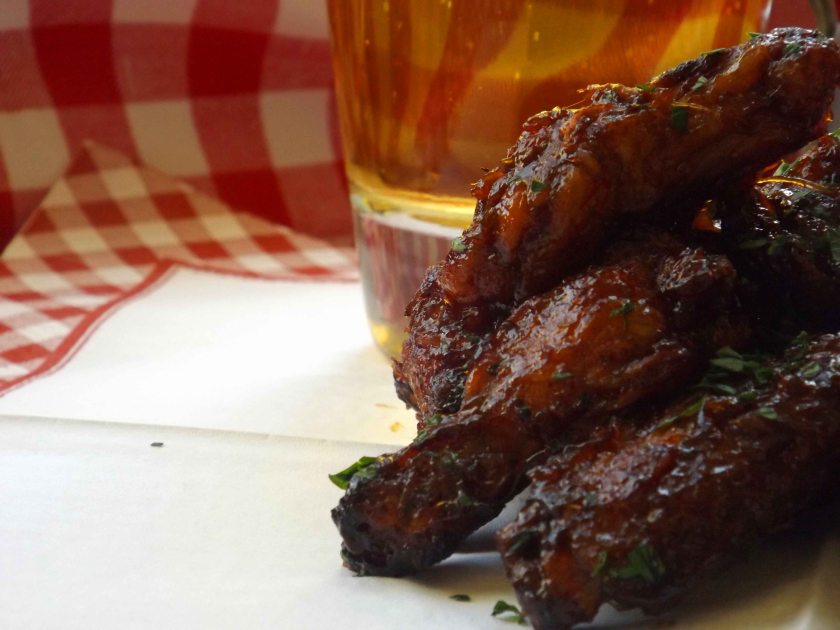
Wings coated with glaze before second bake - Return the wings to the rack and bake an additional 7 minutes.
- Cooking Method 2 (for a standard oven):
- Preheat oven to 250F.
- Line a rimmed baking sheet with foil and place a wire rack on it. Either spray the rack with a non-stick cooking spray or brush with oil.
- Dry the wing pieces well with paper towels.
- Place the wings in a Ziploc bag. Dump the rub mixture into the bag and shake vigorously until all the pieces are coated evenly. Drizzle 1 tbsp of vegetable oil into the bag with the wings and shake again.
- Place the prepared wings on the rack, skin side up, in a single layer. It’s okay if the pieces are touching.
- Bake for 30 minutes, then increase the oven temperature to 400F and bake for another 45 to 50 minutes or until the wings are golden brown.
- Remove the wings from the oven but leave the oven on.
- Place the wings in a heatproof bowl and coat with the desired glaze. You will only need about half of the glaze to sufficiently coat the wings. Use any remaining glaze as a dip, if desired.
- Return wings to rack and bake an additional 5 to 6 minutes.
- Cooking Method 1 (for a convection oven):
Notes:
- You can use any barbeque sauce (commercial or otherwise) in place of the Orange-Ginger Glaze if you wish. Start by using about ½ cup to glaze the wings, adding more if needed for good coverage.
- When serving the wings, try to avoid piling them on top of each other as doing so reduces their crispiness.
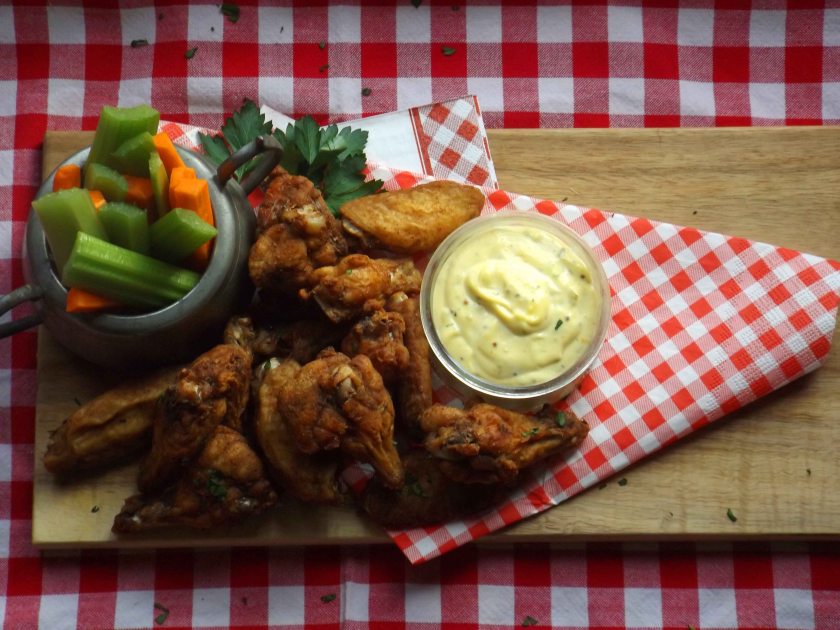
- I often leave half of the wings unglazed, and return them to the oven with the glazed wings for the final few minutes of baking. Usually I make a dipping sauce to go with the unglazed wings.
- In the event you want a dipping sauce, you can make one very quickly by stirring some of your glaze into 1 cup of mayonnaise or a combination of ¾ cup mayonnaise blended with ¼ cup of sour cream. For these uncooked sauces I use fat reduced mayo and sour cream. Another quick dipping sauce is:
- Mustard Mayonnaise Dip (adapted from thespruceeats.com) – Combine 1 cup mayonnaise, 1 tsp Dijon mustard, 3 tsp yellow ball park mustard, 2 tsp grainy mustard, 2 tsp chopped fresh dill in a small bowl and mix well. If you want a sweeter version, add 2 tsp of honey, or to taste.
- The cooked wings will keep for a day or two in the refrigerator and still taste good but they will lose their crispiness.

These wings are GREAT!
LikeLike
Yummy!
LikeLike
These wings are great!
LikeLike
Yum!!!!
LikeLike